This guide is made for: Minecraft: 1.7.10 Forge: 1.7.10-forge10.13.4.1558 Ars Magica 2: 1.7.10_AM2-1.4.0.009 AnimationAPI: AnimationAPI-1.7.10-1.2.4
First of all Ars Magica 2 is a complex and indepth mod, you can't just find a pool of liquid etherium, craft a picture frame, place a book, and start blasting fireballs. Getting a Arcane Compendium is the first step, however, it is one of many before you can start using magic. This guide will get you using spells through a step by step process with images.
Step 1: Getting Arcane Compendium
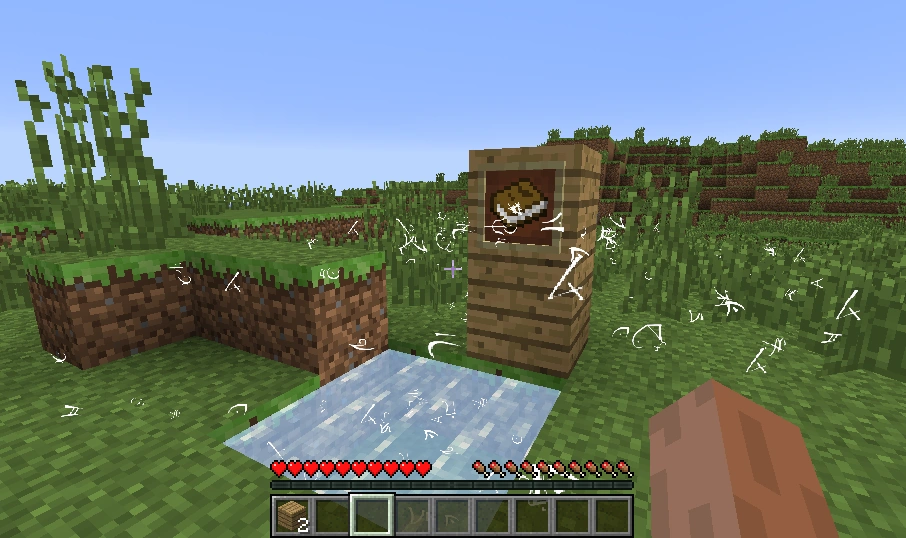
Locate liquid etherium, place any block next to pool, place item frame, place book in item frame.
All of the knowledge will gather into the book via white letters swirling, once done it will turn into a purple book aka Arcane Compendium.
Knock the book out and glance at it by right clicking with Arcane Compendium in your hotbar, it will explain a lot of info but probably not detailed enough which is why you're reading this guide.
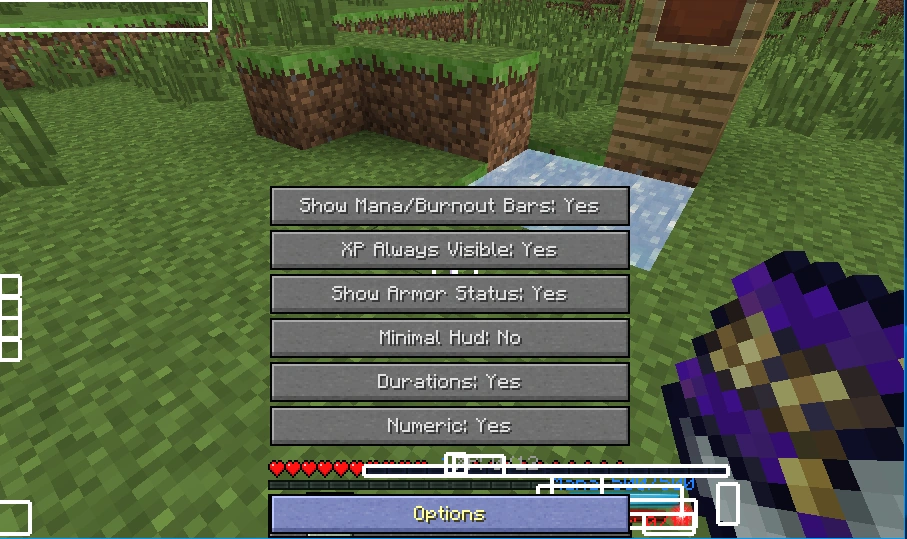
The first thing I recommend is typing "/amuicfg" and move your xp bar, mana bar, and burnout bar by clicking and dragging the white boxes around. Also if you click options at the bottom middle you can add numbers to all the bars. Press ESC to save changes.
Optional Step: Craft Magician's Workbench
Ars Magica 2 requires you to use a variety of new items and recipes so I highly recommend building and using a Magician's Workbench in place of a Crafting Table. It's a Crafting Table that has two grids and keeps items in place even if you walk away also it can store items just like a chest because recipes take a lot of resources that can be pain to walk back and forth with. Both grids can be used simultaneously so if you forgot to craft planks, carpet, etc you can craft them while crafting your main recipe. Workbenches can be upgraded to have two 3x3 grids. Once you've used it you'll wonder how you ever minecrafted without it.
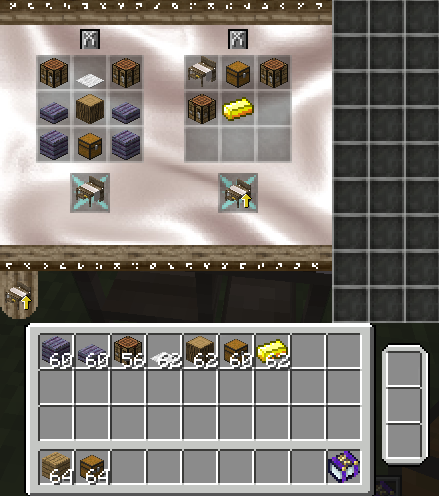
Upgraded verison of Magician's Workbench with two 3x3 crafting grids. Shows how to craft Magician's Workbench (Left) and Magician's Workbench Upgrade (RIght).
Step 2: Unlocking spell shape and components
You will need to craft and place an Occulus.
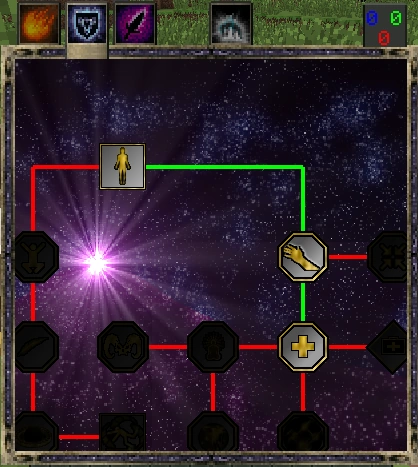
After placing Occulus right click on it and the tech tree will open up. You will have 3 tabs at the top: Offense, Defense, and Utility.
You start off with 3 blue skill points, select at least one shape (square) and one component (octagon). Modifiers (diamond) are not needed for your first spell. I recommend starting with a spell that uses yourself as the target like: Defense tab: Self>Regeneration>Heal because in order to get more skills you have to level up, to level up you have to use your magic. Any offense spells have to be used on a live entity to gain XP which will take longer to level up. Where as a self healing spell can be used anytime anywhere.

Self>Regen>Heal
Step 3: Writing your first spell
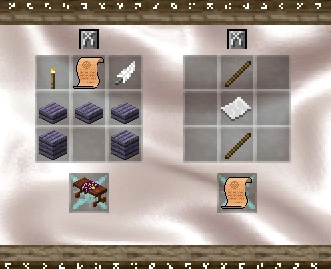
In order to use the shape and components you unlocked you'll need to write the spell out using an Inscription Table so craft the Inscription Table and place it.
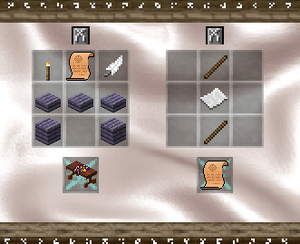
Inscription Table (Left) and Spell Parchment (Right)
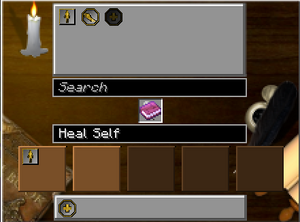
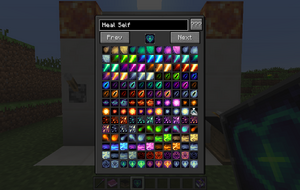
Then you'll need to craft a Book and Quill (Feather, Book, Ink) then right click on the Inscription Table and the UI will show up. Place Book and Quill in middle, then drag and drop a shape (square) into the first brown box, then drag and drop a component (octagon) into bottom grey bar. Name it, then drag book out of the middle into your hotbar. You just created a Spell Recipe which will be used to create your new spell.

Example: Heal Self: Self (square) in brown box, Heal (octagon) in grey box.
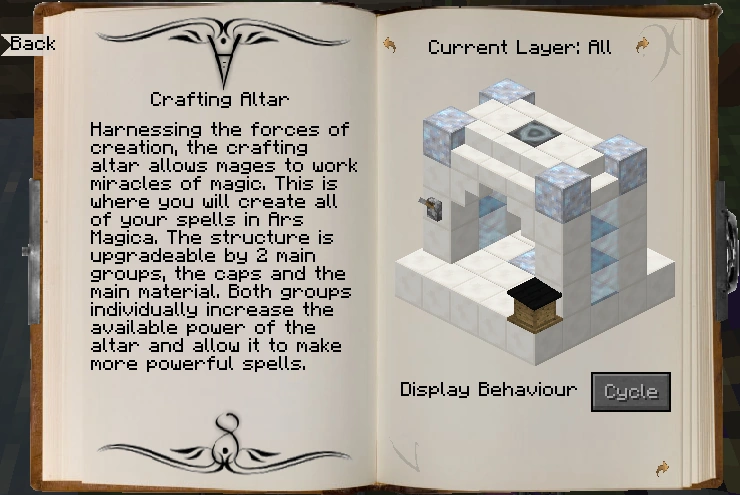
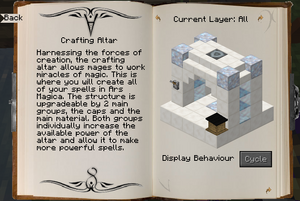
Step 4: Before Creating The Spell
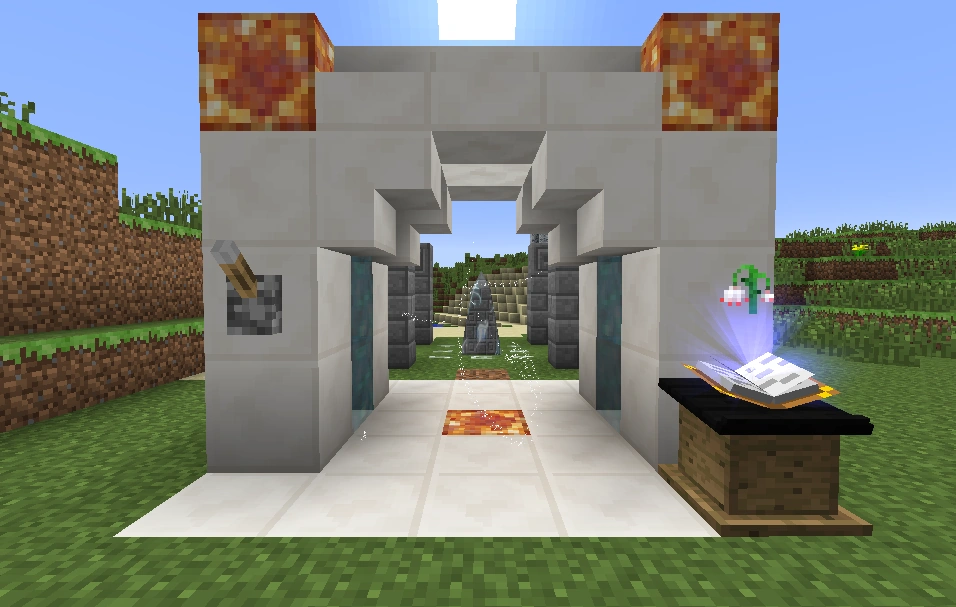
So far you've only created a recipe for your spell, before you can cast your spell you'll need to build a multi-block structure called a Crafting Altar. Open your Arcane Compendium, click Structures tab(on left), click Crafting Altar. It will show you all of the materials and their bonuses that can be used and has a useful layer by layer visual (click arrow next to Current Layer: All).
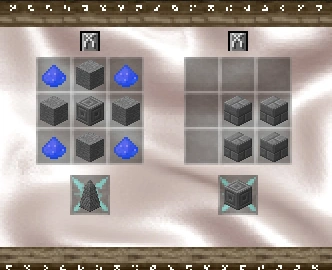
You'll need to craft a Lectern, Magic Wall, and Crafting Altar to build the Crafting Altar Structure.

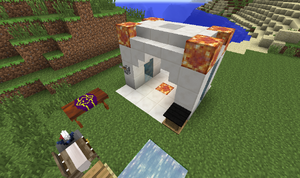
Crafting Altar Structure with highest tier blocks for biggest bonus (Quartz and Sunstone Block).
Step 5: Obelisk and Essence (Neutral)
This step only applies if you need Essence (Neutral) (usually any spell that has the "self square") otherwise you can skip for now, but you'll need it eventually. To gather Essence you'll need to craft an Obelisk.
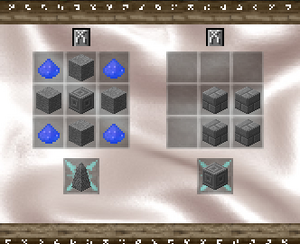
Obelisk (Left) and Chiseled Stone Brick (Right)
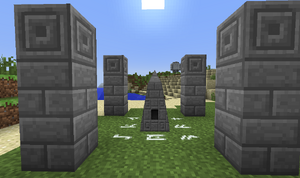
An Obelisk can be upgraded using Wizard's Chalk Circle and/or Stone Brick Pillars capped with Chiseled Stone Bricks. However, a Obelisk is fully operational without either upgrade.
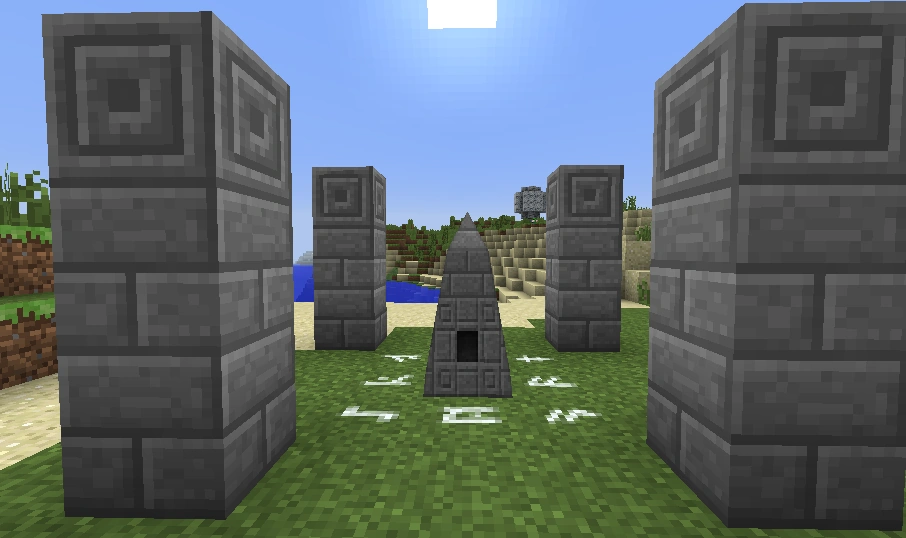
Fully upgraded Obelisk with Wizard's Chalk Circle and Stone Brick Pillars capped with Chiseled Stone Bricks.
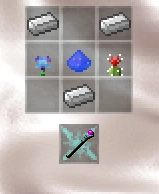
To connect your Obelisk to your Crafting Altar Structure, you'll need to craft a Crystal Wrench.
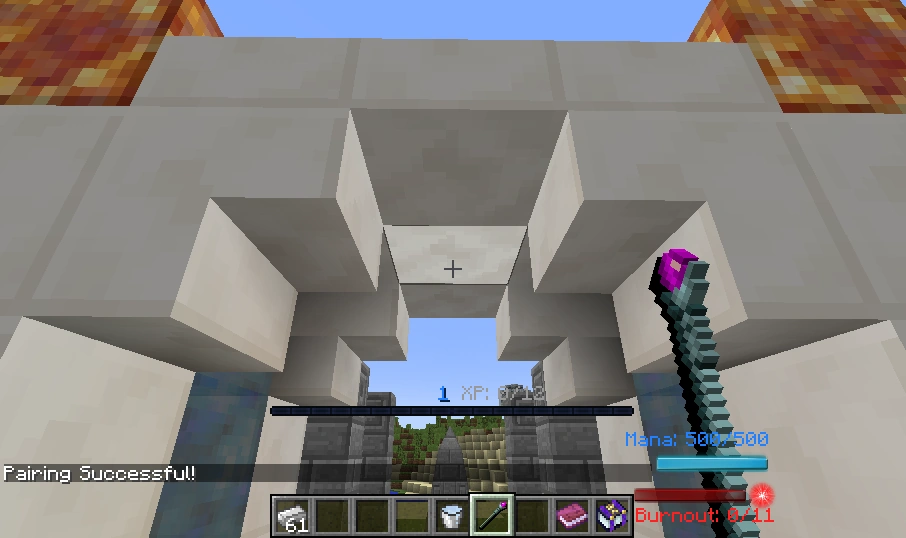
While holding the Crystal Wrench right click on the Obelisk and then right click on the Crafting Altar block in the middle of the ceiling of the Crafting Altar Structure. If done correctly you'll receive a message "Pairing Successful!"
Holding Crystal Wrench right clicking on Obelisk and then right clicking on Crafting Altar Block (Highlighted).
Now you just have to fuel the Obelisk with Vinteum Dust or Bucket of Liquid Etherium, however, without a Mana Battery the Essence will simply deplete so hold off on placing any fuel in the Obelisk until the Spell Creation process asks for it.
Step 6: Collecting Materials
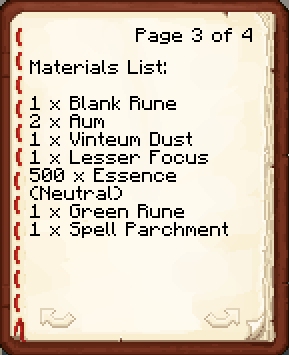
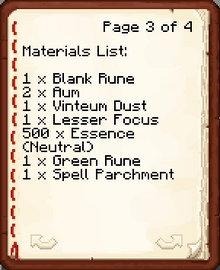
Almost there! Next you'll need to right click while you are holding your Spell Recipe that you created. A list of required items will show usually on the second to third page.
.png)
Items needed to create Self>Heal
Gather the items on your materials list, then place your Spell Recipe Book onto the Lectern, and then throw the Blank Rune onto the middle block of the Crafting Altar Structure. An image of the next item should float above the book on the Lectern.

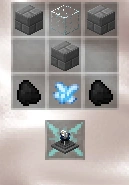
Crafting Altar after a Blank Rune was thrown into the middle. Shows an Aum as the next item to throw in.
Now continue to throw your items in one at a time, if you need essence connect the Obelisk to the Crafting Altar Block using a Crystal Wrench and then put fuel in the Obelisk. Pull the lever on the Crafting Altar Structure and it will be added.


Spell Creation requesting 500 x Essence (Neutral).
The last item will always be a Spell Parchment, once that is throw in your spell will be floating in the middle of the Crafting Altar. Pick it up and right click while holding it, a menu will pop up asking you to verify spell name and select an icon. Hit Esc to save changes.

You can now cast that spell by right clicking while holding it.
Congratulations! You're officially a Mage now!?!?
Step 7: Continue to progress
From here you level up by using your spell and gain new blue skill points to use in the tech tree to create new spells. To retrieve any spell recipe from the lectern, simply crouch and right click the lectern to return the recipe to your inventory.